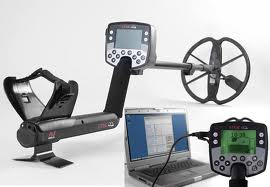
 This is my machine and I love it! It’s well made, and not too heavy. It is also one of the deepest if not the deepest detector on the market. The digital readouts for target ID are consistent and stable, which with practice, aided by the pitch of tone being emitted, allow you to get a pretty good idea of whats down there. For me, there is a lot of pleasure to be had in trying to predict what it will be before I dig it, especially when I’m right! 🙂 It also works miracles around iron. I have pulled coins and old nails out of the same hole on several occasions. Something my trusty old Minelab ‘Sovereign elite’ detector, as good as it is, just wouldn’t be able to do. I dread to think what I may have missed in the past due to its unfortunate proximity to a lump of rusty old iron. Well thankfully those fears are now gone.
I make no claim that this is the best detector. I don’t know enough about the others to compare. I only know that its the best detector I’ve ever had. This is my third detector. I started off with Bounty hunter tracker IV. OK for beginners if you just want to dabble now and then. However, its just not strong enough in all respects for serious deep down and dirty detecting. It has to be at least strong enough to take you using it as a light crutch now and then. Its maximum depth was about four to six inches. With it you will find mostly modern stuff. Saying all that, I found enough with it before it broke, to enable me to upgrade to my second detector, which was The Minelab Sovereign Elite.
My settings
Disclaimer: I do not profess to be an expert! I just know what works for me. For more expert technical advice, you should consider joining a forum or a specialised detector group on Facebook.
Personally.. I like to keep it simple. I prefer 4 tone ferrous, and keep discrimination to a minimum. I only want to reject the pure iron, so I null out lines 1, 34 and 35 .
If I want to cherry pick new ground, or don’t have a lot of time, I might just use 2 – 15 ferrous values. This is good for finding gold, silver, jewellery, coins, and other bright and shiney objects, and you will waste less precious time digging junk, apart from aluminium of course! 🙁 However, those settings are not so good for artefacts such as buckles, crotal bells, strap ends, pendants, toys, tools, weapons, and many other desirable objects. Why? What’s different about these targets? (Can you guess?) The answer is that they all usually have a bit of iron attatched to them. On some buckles, especially if complete, there will be an iron pin. With crotal bells, when complete, there will almost certainly be an iron pea inside. On pendants, toys and tools, weapons, or even a super rare British musuem piece Viking pot handle, there could very well be an iron rivet or two. These are the type of targets that will produce the ‘iffy’ two tone scratchy signals, but are often the best finds of all!
The Halo Effect
Something I’ve noticed when digging a target is that the signal can often disappear once you have broken the earth? I have come to realise that this is usually when its either a deep, or a very small target close or on the surface.. In the case of the deep target, what has happened is that when a metallic object lies undisturbed, after a while it will form a sort of halo around itself, caused by Ions leaching into the surrounding earth. This causes the target to appear bigger than it actually is to the detector. When you break the ground, you disturb that halo and the target gets smaller and you may lose the signal. Hopefully by switching to pin point, you will be able to pick it up again. If not, you just need to dig deeper. You need to consider that after the first spadeful, there is now air between the coil and target which will reduce the coils effectiveness. The coil works better through mass than air. (which is why air tests have limited validity)
In the second scenario of a disappearing target, you may have a small target is sitting on or very close to the surface. If you fail to spot it by eye, then the action of digging out a clod and turning it over will put the target to the bottom of the clod. Somes spinning the clod over causes the target to fly off and out of your area of interest. This coupled with the fact that the target is small to start with, could cause the signal to suddenly disappear.
If it registered a target, don’t stop till you find it. Have faith in your machine!
A pin pointer is a must for any serious detectorist. The E-Trac is great at picking up the tiniest bits of metal, but not so good at pinpointing them . A pointer will save you time, you will dig smaller holes, and help you to avoid accidentally damaging the object. Personally, I would recommend the Garrett pro pointer.
How Deep Can The E-trac go?
This of course depends on the size of the target. I once followed a signal that in the end was as as deep as the full length of my arm plus as much of my shoulder as I could get in. About 32″ (2ft 8″ or 81 cm) At the bottom of the hole I had exposed an area of copper sheet, which sounded hollow when knocked. After satisfying myself that it was just plain metal and not decorated or special in any way I punched through and managed to squeeze my hand into the hole. Dreaming of pulling out handfuls of gold coins. I was to be disappointed by only finding some sort of gravel and lime mix. But I digress.. As a rule of thumb, I would say small objects down to about 6 inches (15cm), medium size objects 6-12 inches (30cm ) and large objects down to 3 feet (91 cm). This of course, will depend a lot on the orientation of the target. The flatter it is, the bigger it will appear, and the deeper you will be able to detect it. Also, don’t forget the aforementioned ‘halo effect’.
Downloads
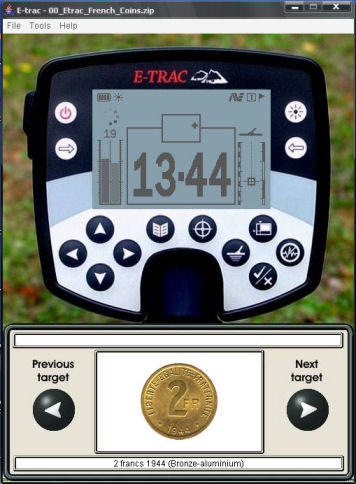
E-Trac Emulator
I found this Emulator by Max Derouen, to be an excellent tool for getting to know the E-Trac and its many programmes and settings.
http://www.minelab.com/__files/f/9429/setup-etrac-en.exe
The following files are available courtesy of TheBeepGoesOn.com
Target ID Spreadsheets E-TRAC and Emulator Files E-TRAC Pattern Files E-TRAC Settings and Patterns 2.0 E-TRAC Settings and Patterns 3.0
73 Responses to Minelab E-Trac