
Specifically developed for the metal detectorist, this application enables the user to track and record their movements, log finds and find spots, and create detailed photo and descriptive records of your finds. Track recordings can be saved and resumed anytime at a later date.
This very specialised app was crowd-funded and is developed and maintained by members of the Facebook metal detecting community. You can play a part and have your say on how the app is developed by joining the Facebook group:-https://www.facebook.com/groups/1569584126596648/
Tect O Trak iOS is a ‘not for profit’ community project. All revenue raised from sales will be used to maintain and develop the application further.
Tect O Trak iOS user guide
– Please allow location and camera permissions when requested –
When you first start the app, you will arrive at this screen.
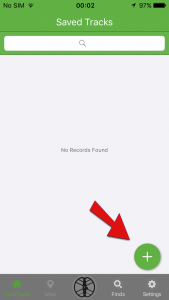
Because this is your first time using the app, you obviously will have no ‘Saved Tracks’ to select and load, so you will first need to create a new search area’ To do this:- click green add/plus button (arrowed bottom right) This will take you to the map screen.
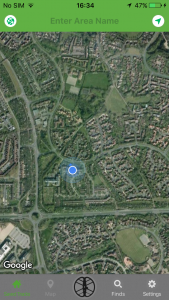
Start by giving the new search area a name (top bar) You will then need to mark out/outline the area you intend to search. It should be noted that the app will not record tracks or finds out of this area. Tect O Trak is designed to help you to focus on one particular area at a time.
After naming the search area, tap the screen to lay your first marker. An area boundary marker can be moved by long pressing it. Hold the marker down and will see the map jump slightly. You will then be able to drag the marker to a more precise position. Be very sure of your search area, as once the boundary is set and saved, it cannot be changed.
To delete a boundary marker, tap the marker then long press the pop-up message.
When you are satisfied with your search area boundary, you need to save it. To do this:- Click the black coil button in the centre of the bottom grey menu bar. The ‘Save’ (floppy disc) icon will appear. Click this icon to save.
Now that the search area has been marked out and saved, you can start track recording. To do this, click the centre coil button again.
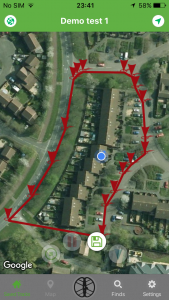
You will then see the ‘Start recording’ button, Click this to begin recording. Should wish to pause recording, click the centre coil button again, and the pause button will appear. To un-pause, click the green button again and the ‘Start recording’ button will reappear.
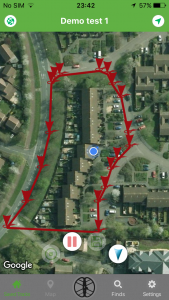
In the picture above, you will see that another button on the right of the array has become available. This is for find recording.
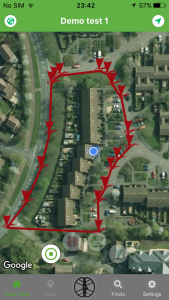
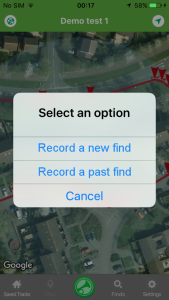
To record a find:- Click the find recording button on the right of the button array. Select from the displayed list ‘Record a new find’ Or… You can record an old find using old photos by clicking: ‘Record a past find’.
This will start up the camera. Take a picture of the find. When you’re happy with the photo click ‘Use photo. You will then be asked to select an option of how to place the findspot marker
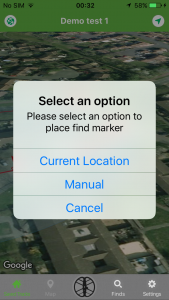
Selecting ‘Current location’ will automatically place the marker in the same place as the GPS position cursor. To enter a find manually ( useful for recording finds when not at location) touch the screen where you would like the marker to be placed. Take care to be exact the first time as it cannot be changed unless you cancel, and start the process again.
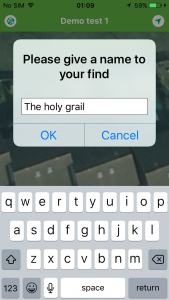
After selecting the find marker placement method, you will be asked to give the find a name. You can also add further details and description now or later by viewing and editing the individual find in the ‘Finds’ list.
To delete a find from the finds list, slide your finger in from the right to reveal the delete option
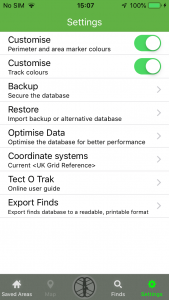
Settings.
Other features include a choice of findspot coordinate formats and customisable boundary and track colours, including a ‘show/don’t show’ option. There is also a tool for exporting the database into a readable, printable CSV file. This type of file can be opened with Microsoft Word or Excel (or free alternatives such as LibreOffice or OpenOffice), or even a convenient online CSV viewer and editor such as http://convertcsv.com. You will find the exported file in the ‘TectOTrak Documents’ folder under the iTunes ‘File Sharing’ entry for the app alongside any backups you have made.
Click ‘Customise’ to change the perimeter and track line colours.
Use the slider buttons on the right to temporarily Hide/Show the track and perimeter lines
Backup and Restore
It is best practice to create a back up after every session and enable Tect O Trak to be included when syncing with iCloud. Following this procedure will make your records indestructible, giving you an extremely helpful and reliable journal for a lifetime.
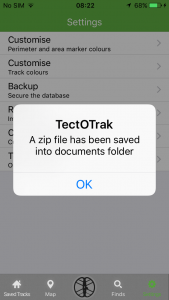
To create a backup database:- On the settings page click ‘Backup’. After successful processing, a zip file is created and stored locally and will be uploaded whenever the device is synced with iCloud. Please note that your database isn’t truly 100% bulletproof until you have a copy stored online. (Should you lose your phone for example)
You will next see the message below. Click OK:-
To import and restore a backup database:- On the settings page click ‘Restore’ You will then see this message:-
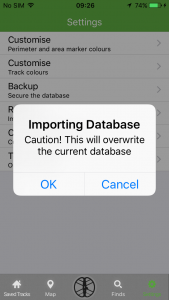
Before clicking ‘OK’ please be aware that this will overwrite your current working database (if you have one). After successfully importing the database, you will see this message:-
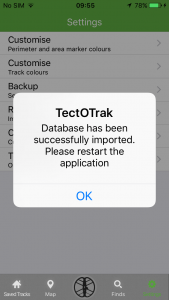
You will need to now restart the app. this action will load the new database.
Accessing the database zip file. Technically, there is no documents folder on iPhone as such because iOS does not allow users to access the file system. To access the database zip you will need to connect your device and run iTunes on your PC.
To view the device, click the phone symbol (see red arrow)
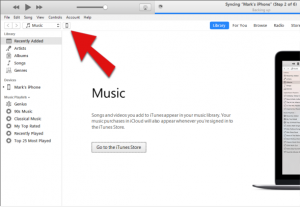
You will then see this screen:-
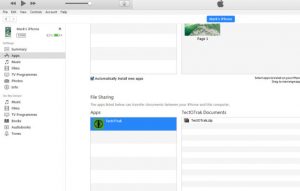
Click on ‘Apps’ in the menu list on the left-hand side, then scroll to the bottom of the screen. You will see Tect O Trak in the list of apps with file sharing permission. The zip file is listed on the right.
If you have any problems or questions, please email me directly:- markseeleyUK@gmail.com for a speedy reply
Good luck. 🙂